Tuesday, January 21, 2014

Laundry is loads of fun

Well, we finally got moved into the new house, only 3 months later than anticipated. The last 6 weeks have been filled with unpacking, organizing, and looking for the "have you seen the...." items probably still buried in the garage. I had no idea we (and by "we", I mean the hubby!) are such pack rats! On last count there were 20 boxes of books with his name on it! But I digress.

I decided that the plan of attack was to first get the house livable and functional. Then the fun stuff, the decorating. But the house is twice the floor space we had before, so its a little overwhelming. Don't get me wrong, we don't have a mansion, but 2000 square feet is big for a lifetime apartment dweller! I made a list, which only seems to get longer as I go along, but never mind that. First off was the laundry room. I chose this only because it was the smallest room in the house and I thought I could knock it out quickly. I'm so naive. It took about a week, but I might actually venture to say I enjoy doing the laundry now because I get to visit this little room.

Before: I painted the room before I realized I hadn't taken a real "before" picture. I was on a time crunch because Sears was coming the next day with the washer and dryer, so I had to move fast! The paint is actually leftover from Little Bug's nursery in the apartment. I thought it would make this little room more cheery because there are no windows in there. Apologies for the sad iPhone pic. It was late, I was tired.


After: It took about a week to complete after the paint and appliances were put in, but I love the results.  I made, as in "made from scratch", the counter top. Home Depot has a nice product called Pure Bond. This one happens to be Red Oak, but they are all nice. Home Depot was even nice enough to cut it down to size for me. I chuckled when he asked me if I had measurements. Of course, dude! Who asks to get get something cut without measurements? I guess it happens all the time.  I'm not that girl. Anyway, he cut it, I sanded and stained it (using 2 different colors of stain), and lovingly brushed 3 layers of polyurethane on it.  The last part was not my favorite. They aren't kidding when they say to get a good brush for this job. I spent way too much time picking out my cheap brush bristles from the sticky poly. Not fun.  But in the end it was a pretty darn close match to the existing cabinets. 


This room is only 5.5'x6', so I had to bust out the wide angle lens to get most of the room in the picture.  The counter top is hung from the walls (but still removable), so there is some clearance above the appliances to keep air circulating and reduce vibration noise since it's right next to the baby's room. I hung the ironing board from hooks because I liked it better than the generic contraption that also hangs the iron. I can hide the ugly iron in the cabinets! There are three other hooks on the white stripe to hang drying clothes, or whatever. The over sized safety pins are from Ballard Design. They add a cool vintage touch to the walls. 


I'm still looking for a nice black and white rug to complete the look, but nothing has spoken to me yet. 


I gathered a few decorative items to jazz up the counter top, and to hide the ugly water spigots.  The laundry sign is a free printable, but I can't remember where from for the life me! I've had the easel for years and have no idea where that came from either. The candle holder is used for collecting coins my hubby leaves in his pockets. It was on post-holiday clearance for $2.98 at Target. The berry picking pot was a purchase last summer at the Rose Bowl Flea Market. That place is SO much fun! The (fake) plant is from Ikea and was stolen from the kitchen. I "hid" the detergent and other such items in the basket because I didn't want the Costco-sized container we actually use to be on display. I just refill the little ones when they get low. The big guns are hidden in the cabinets. Since these pictures where taken I've added a very large apothecary jar filled with Oxyclean. That stuff is magic, especially if you have pets and kids. 

So that's one room crossed off the list. On to the next project! 

-Sarah

Sunday, November 3, 2013

Perfect Little Pumpkins

C'mon, does it really get any cuter than twins? I think not. A beautiful family, a pumpkin patch, and a warm autumn day. Perfection.


Brayden and Kieran are almost adorable enough to make me wish I had twins. Almost.... :)

-Sarah

Thursday, October 31, 2013

From Pine to Pretty

I've been back on a DIY kick lately because we are finally getting close to moving and I want to have some projects already completed for the new house.

Here's a few things I've been working on...

Console table makeover. This little gem was a discounted find on line. It cost me a whopping $30, plus about $20 in paint, primer and supplies. I have plenty of paint leftover for something else too.


I admit I went through a light colored wood phase sometime in the late 90's, but now I'm all about black or charcoal gray furniture. So this little table was destined for a Pottery Barn knock-off look. It took a coat of primer, 3 coats of black paint, lots of sanding, a stain pen for the distressed edges and a few coats of furniture wax. I'm glad I tried this on a small piece first because there was more work involved than I anticipated, but I love the end result.  I think it looks a lot more sophisticated and updated. BTW, I found a very similar table on line and it cost $900! Now, that's crazy talk. Props if you spotted the cat watching the progress! 


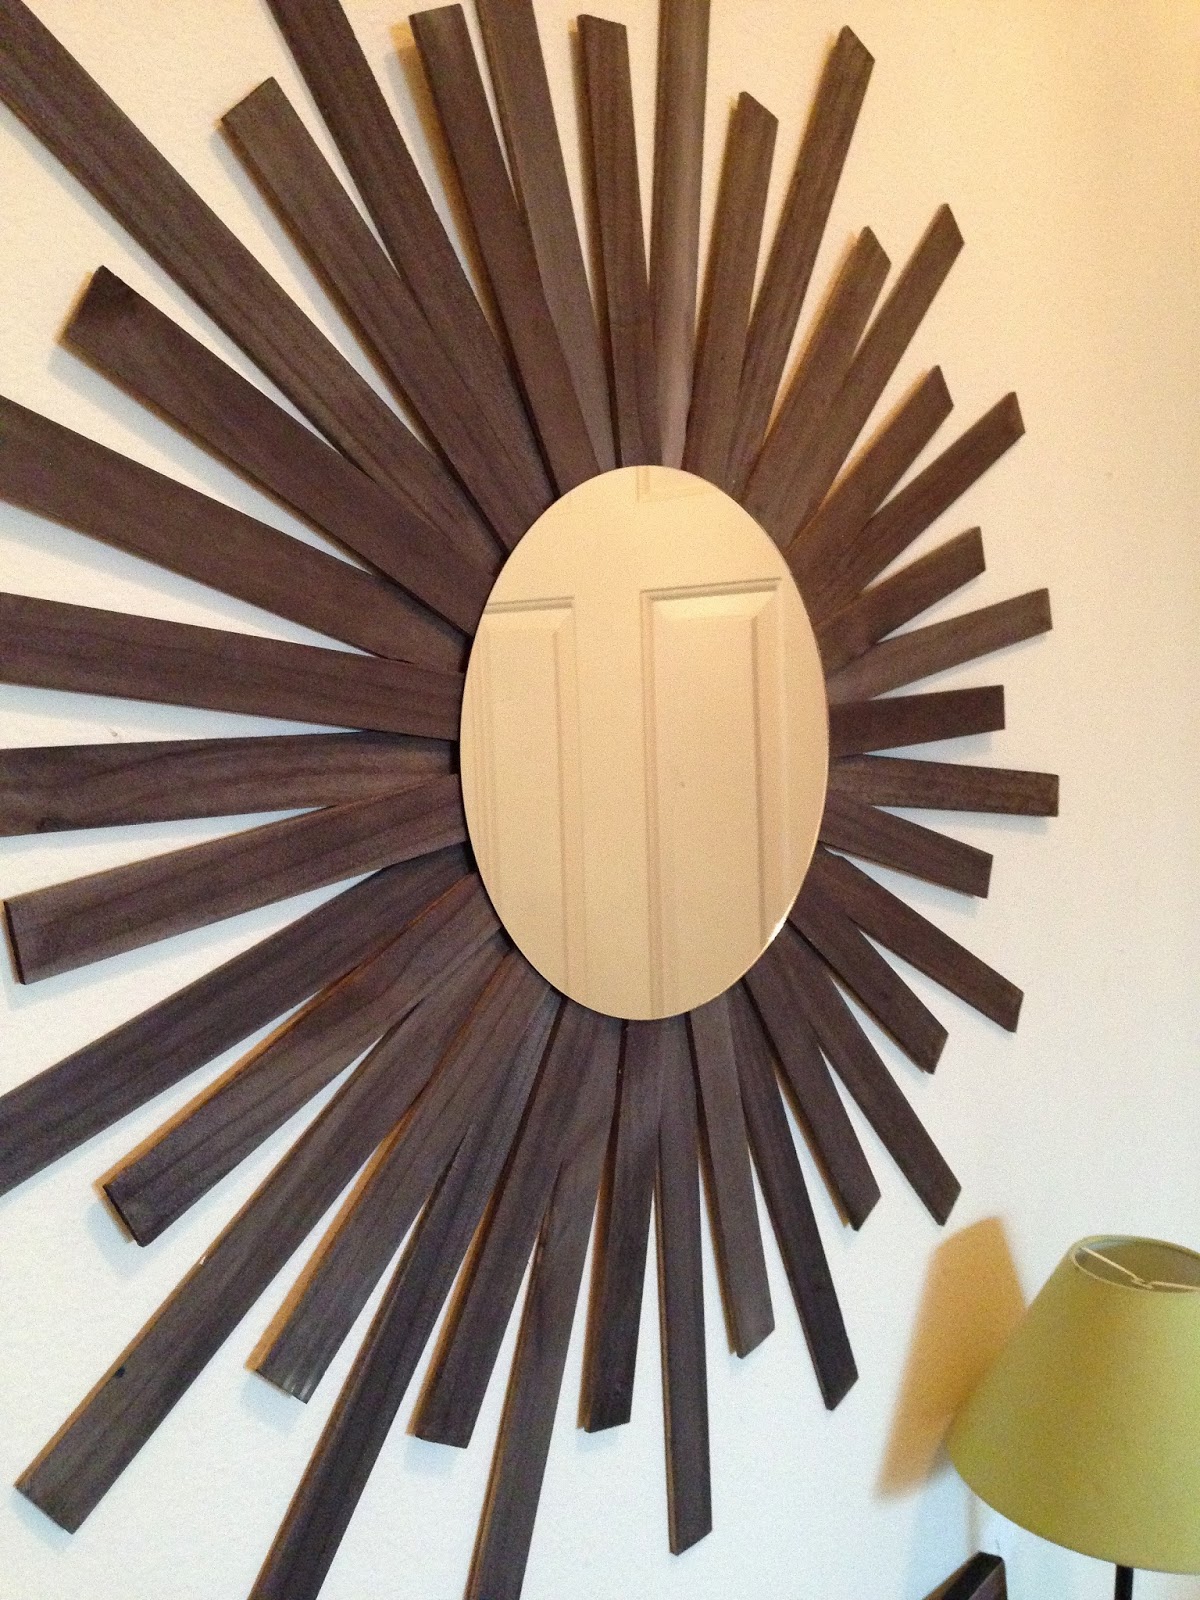
A few of the other DIY projects in this pic include the star bust mirror, the faux canvas print and the succulent terrariums.  


This mirror was made with a 10" round candle display plate from Michaels and about 50 paint sticks from Home Depot. Because I'm totally chicken, it actually took me 3 months to collect enough paint sticks to make this! I was totally embarassed about grabbing 50 sticks at once, so it took me several trips to grab handfuls at a time. When I finally had enough, I used the vinegar/steel wool approach to staining them. It didn't give me the dark gray color I desired so I added a coat of really strong black tea and they instantly turned this color! It was perfect and easy. The short sticks are trimmed to length and then they are hot glued to the back of the mirror. I recommend drawing a circle guide on the back to help keep you on track. It turned out bigger than I thought, but is so light weight that only one picture hanger glued on the back holds it up. 


My hubby thought I "messed up the edges" on the table. I guess he doesn't understand the distressed look! But I think it looks really good and is far more interesting than a straight black piece. I used a stain pen for the edges because the original pine was too light for my taste.  

The terrariums are glass vases from Goodwill, rocks, dirt and flea market succulents. They are probably the only plants on earth I can keep alive. No joke. 

The "canvas" is actually an 8x10" luster print from Costco glued (Mod Podge) to an artist canvas from Michaels with the edges painted black. It probably cost less than $4 to make, which is way cheaper than a real canvas! I made 3 total which will probably go on a gallery wall in the new house.

The new house walk-thru is next week. I'm excited to see everything installed, new and pretty. Moving day can't come soon enough! Happy Halloween!  

-Sarah

Friday, September 27, 2013

365 Days


2190 dirty diapers
1825 washed bottles
488 ounces of homemade baby food
6 airplane flights
2 runny noses
1 trip to urgent care


 And just like that, 365 days have flown by.

Happy first birthday, Lil' Bug. You are loved.

-Mama


Monday, September 23, 2013

Sweet as apple pie

I could just eat this little girl up! Adorable Ava killed me with those big blue eyes and coy smile. She was such a pleasure to shoot.


Happy first birthday, doll face!

-Sarah

Friday, August 30, 2013

Baby Blues

This little guy is all boy! I had the pleasure of hanging out with him and his parents on a warm summer afternoon to snap these pics for his first birthday. Can you believe his eyes?


Happy First Birthday, Joaquin! 

-Sarah


Thursday, August 15, 2013

Snap Happy

I fell off the blogosphere for a couple weeks, but for good reason. I've been jet setting across the country. OK, it was just a quick trip to Seattle, but I had the honor of shooting the wedding of a dear friend, my first wedding gig ever! I was more than a little nervous, but I think I got a few keepers. 

The setting was intimate, the bride was glowing. It was a beautiful affair with a perfect couple. Congratulations Robyn and Louis. May you have many happy years ahead of you.


Beautiful couple.


Robyn and Isabelle, the sweetest flower girl ever!


Robyn has the BEST taste in shoes!

Now I'm on a photography roll! In preparation for a family/one year birthday shoot coming up, I've been location scouting. There are so many parks and nature areas in the Santa Clarita Valley that I never knew about. Today we visited Placerita Canyon Nature Park. Of course, my test model came along for the ride.  I wonder at what age she will say, "No more pictures, Mom!"


Other things that have been keeping me busy? Cleaning the garage (I found lots of fun vintage items I never knew we had!), packing up non essentials, collecting boxes (Trader Joe's is a fabulous free source!), purging junk, dreaming up my next DIY project, and planning a first birthday party for Lil' Bug.  Its been a crazy summer!

-Sarah